Ice Cream Cake
Ice cream cake is the kind of dessert that makes people light up. It’s nostalgic, unfussy, and always welcome at birthdays, cookouts, or a quiet Friday night. With a few smart layers and a little patience, you can make one at home that tastes better than store-bought.
No special equipment is required, just a lined pan, store-bought ice cream, and your favorite crunchy crumbs. If you can spread softened ice cream, you can make this.
What Makes This Special
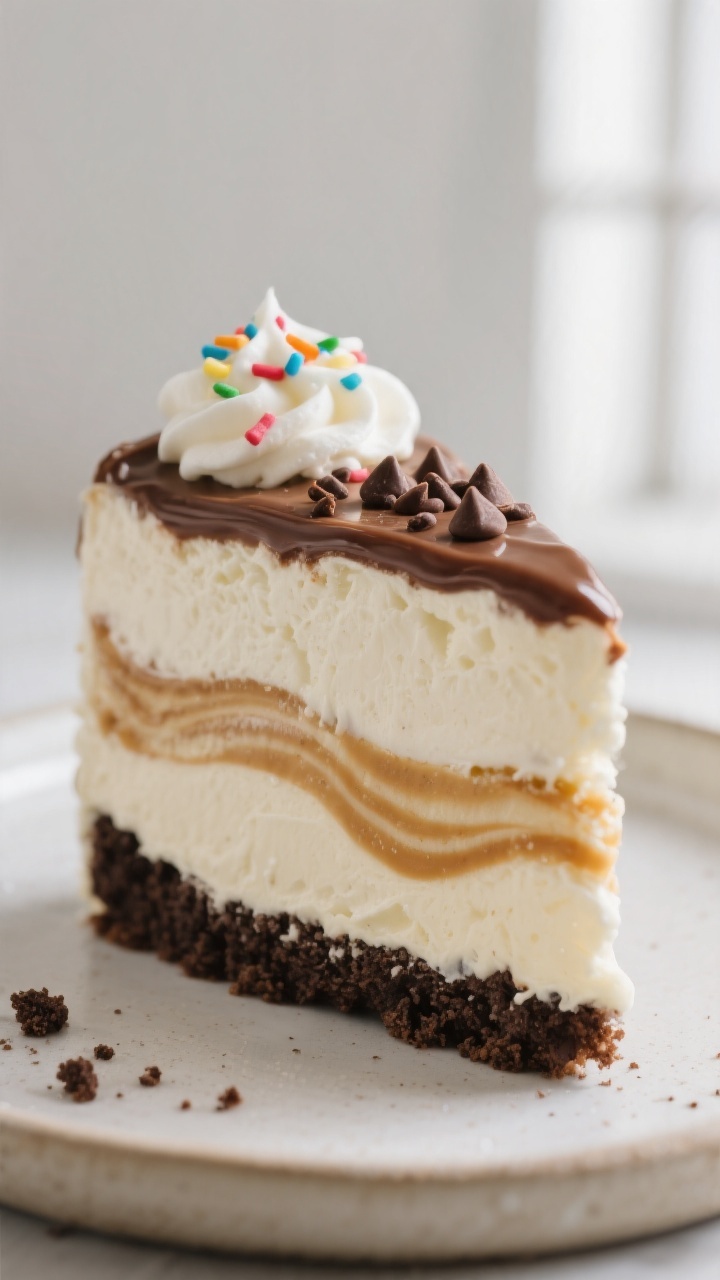
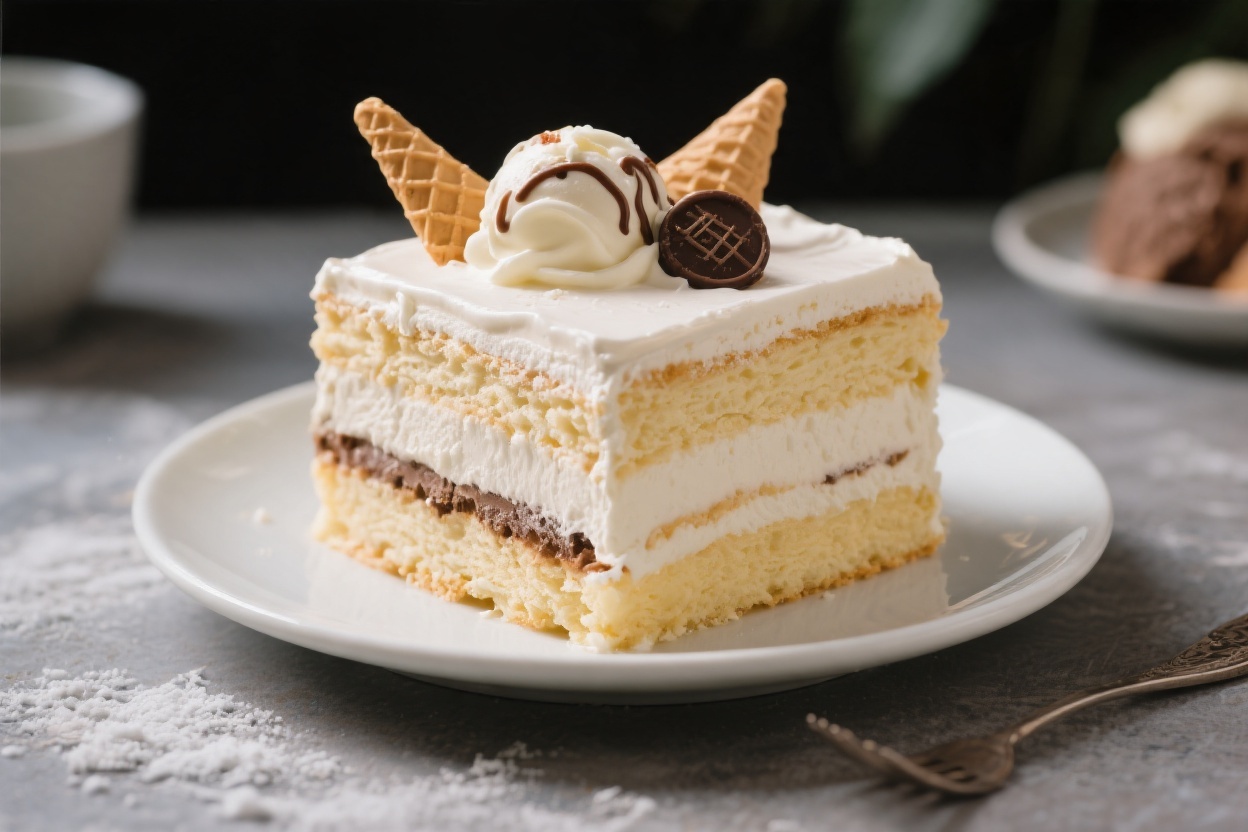
This ice cream cake leans into texture and flavor contrast. You get creamy layers, a salty-sweet crunch, and a glossy finish that looks impressive without effort.
It’s also fully customizable—mix and match flavors to fit the season or your cravings. If you’re cooking for a crowd, it scales easily and can be made days ahead. That means less stress on party day and more time to enjoy the moment.
Ingredients
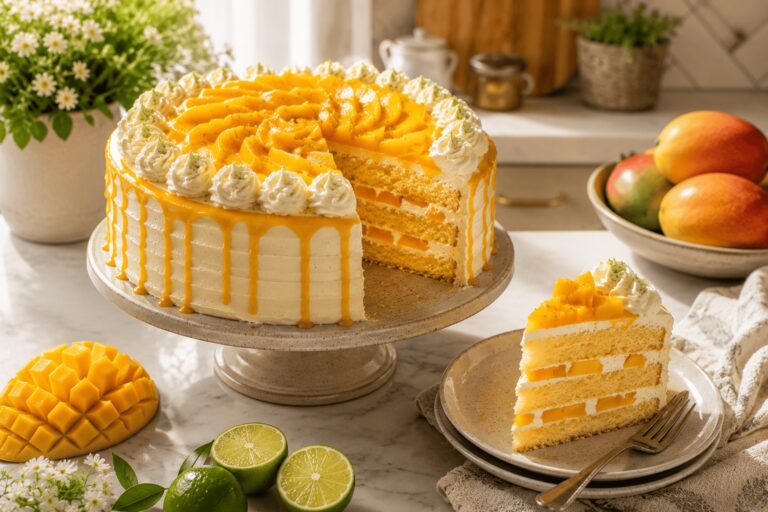
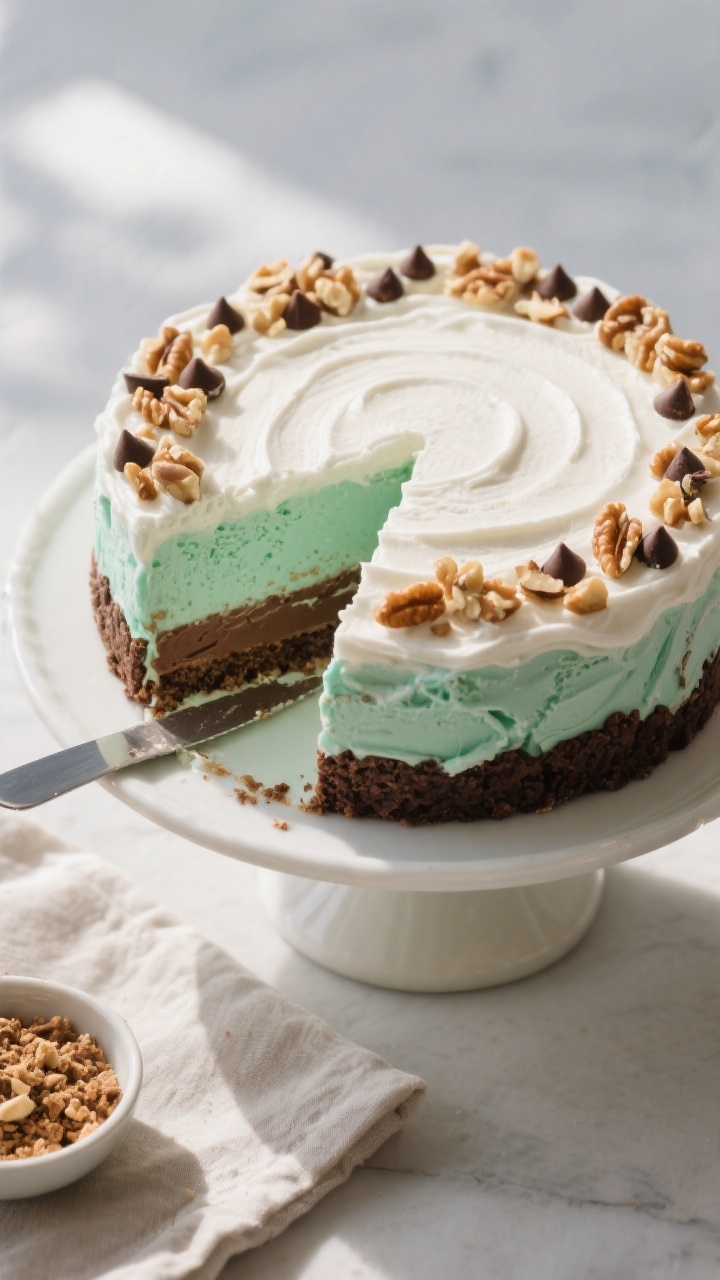
- 2 quarts ice cream (two complementary flavors work best; think chocolate and vanilla, cookies and cream and strawberry, or mint and chocolate chip)
- 2 cups crunchy layer (crushed chocolate cookies, graham crackers, or wafer cookies)
- 6 tablespoons unsalted butter, melted (for binding the crumbs)
- 1/2 cup hot fudge sauce (store-bought or homemade), warmed just until pourable
- 1/2 cup caramel sauce (optional), warmed just until pourable
- 1 cup whipped cream (or whipped topping), for finishing
- Pinch of salt (to balance sweetness)
- Optional garnish: sprinkles, chopped nuts, mini chocolate chips, crushed peppermint, or cookie crumbs
Step-by-Step Instructions
- Prep your pan. Line a 9-inch springform pan or a loaf pan with plastic wrap or parchment, leaving overhang for easy lifting.
Chill the pan in the freezer for 15 minutes so the first layer sets quickly.
- Soften the ice cream. Place your first ice cream flavor on the counter for 10–15 minutes, until scoopable and spreadable but not melted. Stir it a few times to even out the texture.
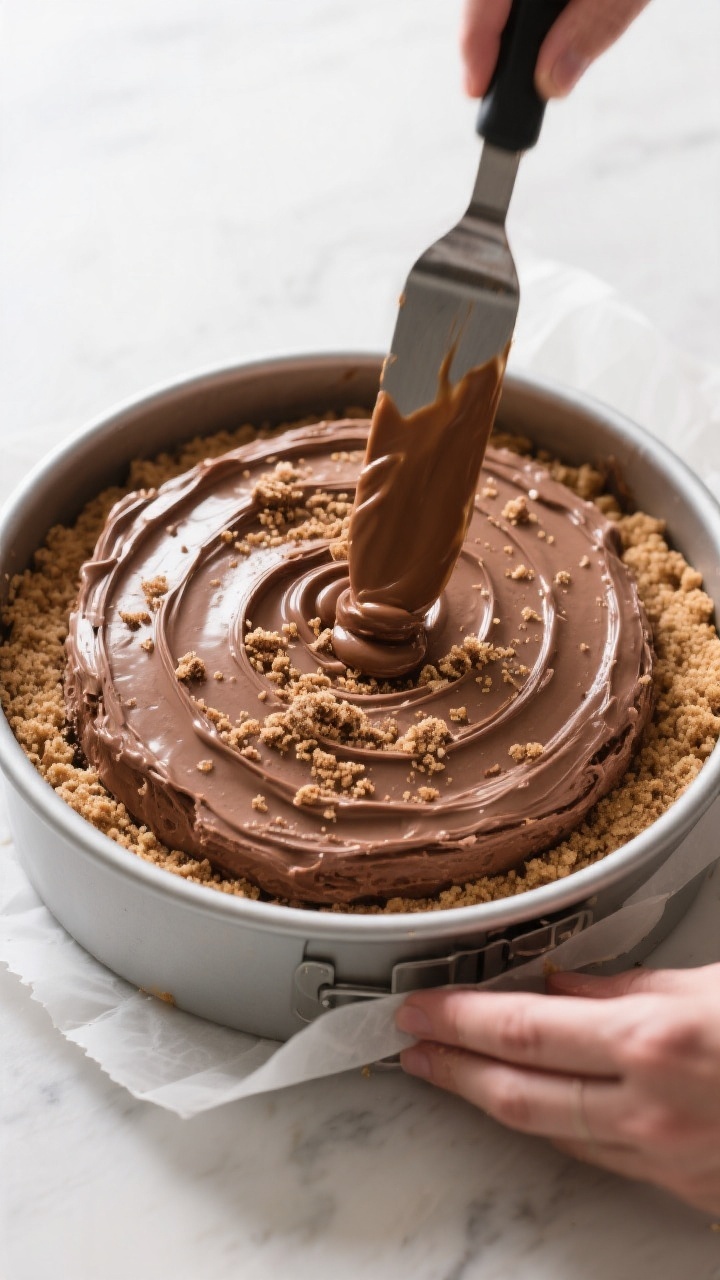
- Make the crunchy base. Pulse cookies or crackers into fine crumbs. Mix with melted butter and a small pinch of salt until it looks like damp sand.
Press firmly into the bottom of the cold pan to form a compact crust. Freeze for 10 minutes.
- Add the first ice cream layer. Spoon softened ice cream over the crust. Spread into an even layer with an offset spatula or the back of a spoon.
Freeze for 20–30 minutes, until slightly firm.
- Drizzle sauces. Spread a thin, even layer of warm hot fudge over the ice cream. If using caramel, add it now in a light swirl. Keep layers thin so the cake slices cleanly.
Freeze for another 10 minutes.
- Add more crunch. Sprinkle a light layer of dry crumbs or mini chips over the sauce. This adds texture and keeps layers from slipping. Freeze again for 10 minutes.
- Add the second ice cream layer. Soften your second flavor as before.
Spread gently over the crumb layer. Aim for smooth, level edges to make unmolding easier. Freeze for 30–45 minutes.
- Finish with whipped cream. Spread or pipe whipped cream over the top.
Keep the layer modest so it firms up well. Return to the freezer for at least 2 hours, or until fully solid.
- Garnish and set. Just before the final freeze, add sprinkles, nuts, or extra crumbs. Press them lightly so they stick.
Freeze at least 4 hours total, or overnight, for the cleanest slices.
- Unmold and slice. Run a warm, thin knife around the edge of a springform pan, or lift using the parchment overhang if using a loaf pan. Warm your knife under hot water, wipe it dry, and slice in quick, confident strokes. Return slices you’re not serving to the freezer right away.
How to Store
Keep the ice cream cake tightly covered in the freezer.
A layer of plastic wrap pressed against the surface, followed by foil or a lid, prevents freezer burn. It will hold well for up to 1–2 weeks with minimal change in texture.
For serving, let the cake sit at room temperature for 5–10 minutes so it softens just enough to slice. Don’t leave it out longer than 20 minutes or you’ll lose those clean layers.
Why This is Good for You
This isn’t a health food, but it has practical perks. It’s make-ahead and low-stress, which can lighten your load for gatherings.
Choosing high-quality ice cream with simple ingredients gives better flavor and fewer additives. You’re in control of portions and mix-ins, so you can dial down the sweetness, salt, or richness to suit your needs.
Small tweaks help too: use lightly sweetened whipped cream, a thinner sauce layer, and crunchy elements like toasted nuts or whole-grain graham crackers for a little balance without sacrificing pleasure.
Pitfalls to Watch Out For
- Melty layers cause slipping. If ice cream gets soupy, freeze between each step. Thin sauce layers also help the cake hold its shape.
- Crumb crust too loose. If it falls apart, you likely need more butter or firmer packing.
Press with the bottom of a measuring cup for an even, tight base.
- Frosty, icy texture. This comes from thawing and refreezing too many times. Work quickly, freeze between layers, and keep the cake covered.
- Hard-to-cut top. Overly thick fudge or a tall whipped cream cap can resist the knife. Keep toppings moderate and warm your knife for clean slices.
- Flavor clash. Bold flavors can fight each other.
Choose two that play well together and keep add-ins consistent with that theme.
Variations You Can Try
- Brownie Base: Swap the crumb crust for a thin brownie layer, fully cooled. Adds fudgy chew that pairs well with mint or vanilla.
- Strawberry Shortcake: Use vanilla and strawberry ice cream, a graham or shortbread crumb, and a ribbon of strawberry sauce.
- Mocha Crunch: Coffee and chocolate ice creams, chocolate wafer crumbs, hot fudge, and a sprinkle of cacao nibs.
- Cookie Dough Dream: Vanilla and cookie dough ice cream with chocolate chip cookie crumb layers and a light caramel drizzle.
- Peanut Butter Cup: Chocolate and peanut butter ice cream, peanut butter cookie crumbs, hot fudge, and chopped peanut butter cups on top.
- Gluten-Free: Use certified gluten-free cookies for the crust and check sauces for hidden gluten.
- Dairy-Free: Use coconut or almond milk ice creams, dairy-free whipped topping, and plant-based sauces.
FAQ
Can I make this without a springform pan?
Yes. A loaf pan or an 8×8-inch pan works well.
Line it with parchment or plastic wrap and leave overhang to lift the cake out. Slice straight from the pan if needed.
How far in advance can I make it?
Make it up to 2 days ahead for best texture and flavor. It will keep longer, but sauces and whipped cream can pick up freezer flavors over time if not tightly sealed.
What if my ice cream is too hard to spread?
Let it sit at room temperature in 5-minute bursts, stirring occasionally.
Don’t microwave the tub; it can create uneven melting and ice crystals. Gentle softening keeps texture smooth.
How do I get super clean layers?
Freeze after every layer for 10–30 minutes, depending on the step. Keep sauces thin and even, and use an offset spatula for control.
Wipe your tool between swipes to avoid smearing.
Can I skip the whipped cream topping?
Absolutely. You can finish with a thin layer of fudge, a chocolate shell, or simply more cookie crumbs. The whipped cream softens the look and flavor, but it’s optional.
What’s the best way to slice it for a crowd?
Warm a long, sharp knife under hot water, wipe dry, and cut in firm strokes.
Clean and rewarm the blade every 1–2 cuts. For small servings, slice into thin rectangles instead of wedges.
How do I avoid freezer burn?
Press plastic wrap directly onto the surface, then cover the pan tightly with foil or a lid. Store the cake away from the freezer door to reduce temperature swings.
Can I add fruit?
Yes.
Keep pieces small and well-drained to avoid icy pockets. Swirl in a fruit sauce layer or fold in chopped berries during assembly for a bright, fresh note.
In Conclusion
Ice cream cake is simple, playful, and endlessly adaptable. With a few layers and a little planning, you can build a dessert that looks bakery-made and tastes like your favorites.
Keep the steps chilled, the sauces thin, and the flavors focused. Then slice, share, and enjoy the kind of treat that makes any day feel like a celebration.

Ice Cream Cake
Ingredients
- 2 quarts ice cream (two complementary flavors work best; think chocolate and vanilla, cookies and cream and strawberry, or mint and chocolate chip)
- 2 cups crunchy layer (crushed chocolate cookies, graham crackers, or wafer cookies)
- 6 tablespoons unsalted butter, melted (for binding the crumbs)
- 1/2 cup hot fudge sauce (store-bought or homemade), warmed just until pourable
- 1/2 cup caramel sauce (optional), warmed just until pourable
- 1 cup whipped cream (or whipped topping), for finishing
- Pinch of salt (to balance sweetness)
- Optional garnish: sprinkles, chopped nuts, mini chocolate chips, crushed peppermint, or cookie crumbs
Instructions
- Prep your pan. Line a 9-inch springform pan or a loaf pan with plastic wrap or parchment, leaving overhang for easy lifting. Chill the pan in the freezer for 15 minutes so the first layer sets quickly.
- Soften the ice cream. Place your first ice cream flavor on the counter for 10–15 minutes, until scoopable and spreadable but not melted. Stir it a few times to even out the texture.
- Make the crunchy base. Pulse cookies or crackers into fine crumbs. Mix with melted butter and a small pinch of salt until it looks like damp sand. Press firmly into the bottom of the cold pan to form a compact crust. Freeze for 10 minutes.
- Add the first ice cream layer. Spoon softened ice cream over the crust. Spread into an even layer with an offset spatula or the back of a spoon. Freeze for 20–30 minutes, until slightly firm.
- Drizzle sauces. Spread a thin, even layer of warm hot fudge over the ice cream. If using caramel, add it now in a light swirl. Keep layers thin so the cake slices cleanly. Freeze for another 10 minutes.
- Add more crunch. Sprinkle a light layer of dry crumbs or mini chips over the sauce. This adds texture and keeps layers from slipping. Freeze again for 10 minutes.
- Add the second ice cream layer. Soften your second flavor as before. Spread gently over the crumb layer. Aim for smooth, level edges to make unmolding easier. Freeze for 30–45 minutes.
- Finish with whipped cream. Spread or pipe whipped cream over the top. Keep the layer modest so it firms up well. Return to the freezer for at least 2 hours, or until fully solid.
- Garnish and set. Just before the final freeze, add sprinkles, nuts, or extra crumbs. Press them lightly so they stick. Freeze at least 4 hours total, or overnight, for the cleanest slices.
- Unmold and slice. Run a warm, thin knife around the edge of a springform pan, or lift using the parchment overhang if using a loaf pan. Warm your knife under hot water, wipe it dry, and slice in quick, confident strokes. Return slices you’re not serving to the freezer right away.
Printable Recipe Card
Want just the essential recipe details without scrolling through the article? Get our printable recipe card with just the ingredients and instructions.