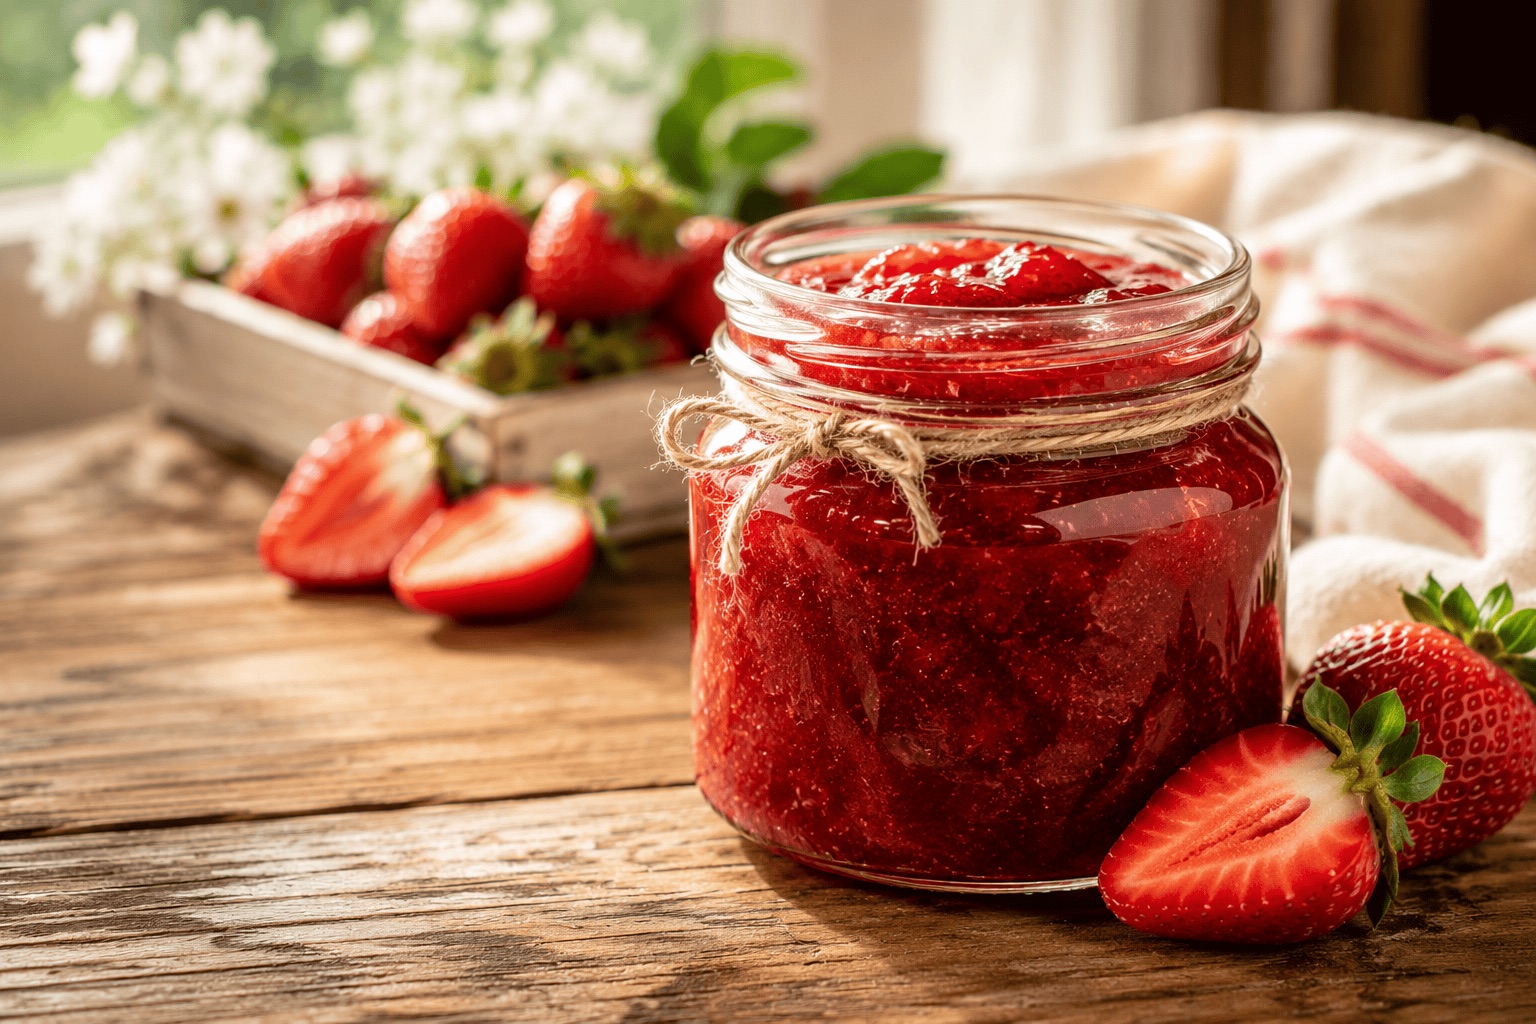
Homemade Strawberry Jam Without Pectin
There’s something timeless about homemade strawberry jam bubbling away on the stove during summer. The sweet aroma fills the kitchen, the strawberries slowly break down into a glossy ruby-red jam, and every spoonful tastes brighter and fresher than most store-bought versions.
This homemade strawberry jam without pectin is simple, cozy, and incredibly rewarding to make. You only need a few basic ingredients, and the natural sweetness of ripe strawberries does most of the work. The result is a rich, glossy jam with concentrated strawberry flavor and a soft homemade texture.
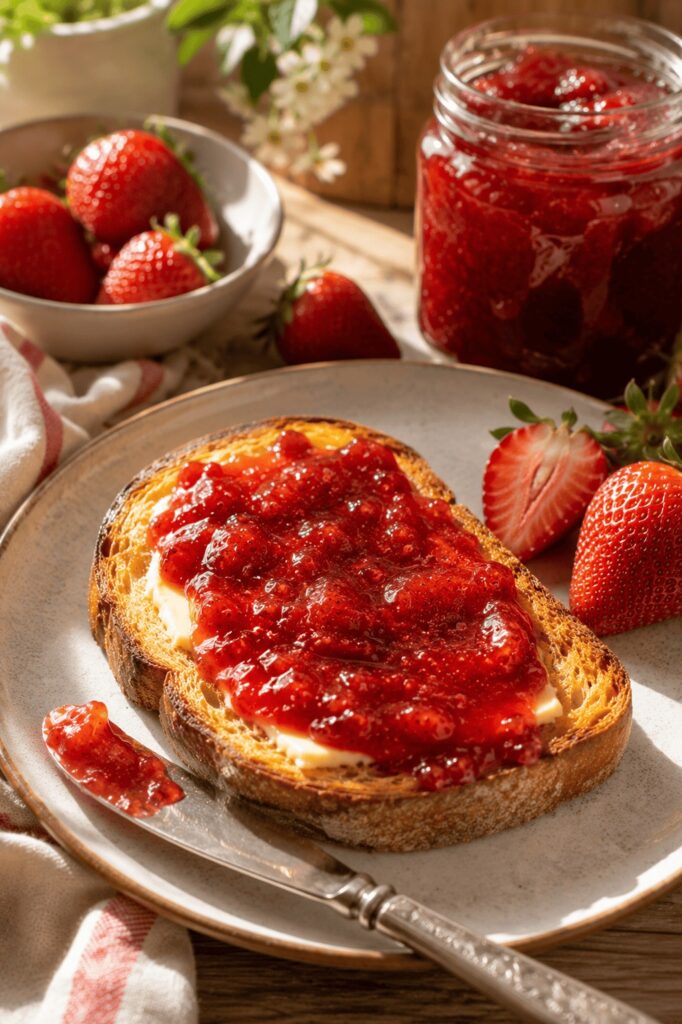
Whether you spread it over warm toast, swirl it into yogurt, spoon it onto cheesecake, or use it in baking recipes, this easy strawberry jam recipe is one of those classic homemade staples worth keeping in your kitchen.
Why You’ll Love This Strawberry Jam
This homemade strawberry jam is one of the easiest summer preserves you can make, and the flavor is absolutely worth it.
The strawberries slowly simmer into a thick, glossy jam with concentrated berry flavor and a fresher taste than most commercial jams.Because this recipe uses no pectin, the texture feels more natural and homemade, with soft strawberry pieces throughout.
You’ll also love how flexible this recipe is. You can make it sweeter or lower in sugar, turn it into a freezer jam, or customize it with flavors like vanilla or balsamic.
A few more reasons to love this recipe:
- Made with simple pantry ingredients
- No pectin required
- Beginner-friendly method
- Rich real strawberry flavor
- Perfect for toast, pancakes, yogurt, and desserts
- Freezer friendly
- Beautiful for gifting
What Is Strawberry Jam?
Strawberry jam is a fruit preserve made by cooking strawberries with sugar and lemon juice until the mixture thickens into a spreadable consistency.
Traditional homemade strawberry jam thickens naturally as the fruit cooks down and the liquid evaporates. The sugar helps preserve the fruit while also drawing out moisture and contributing to the final texture and sweetness. Lemon juice brightens the flavor while also helping the natural pectin in the fruit create a better consistency.
Some recipes use commercial pectin for faster thickening, but many classic strawberry jam recipes rely entirely on the fruit itself. Slow simmering creates a richer strawberry flavor and a softer homemade texture that many people prefer.
Strawberry jam is slightly smoother than preserves, which usually contain larger chunks of fruit. Jam spreads more evenly and works beautifully in both breakfast recipes and desserts.
Ingredients for Strawberry Jam
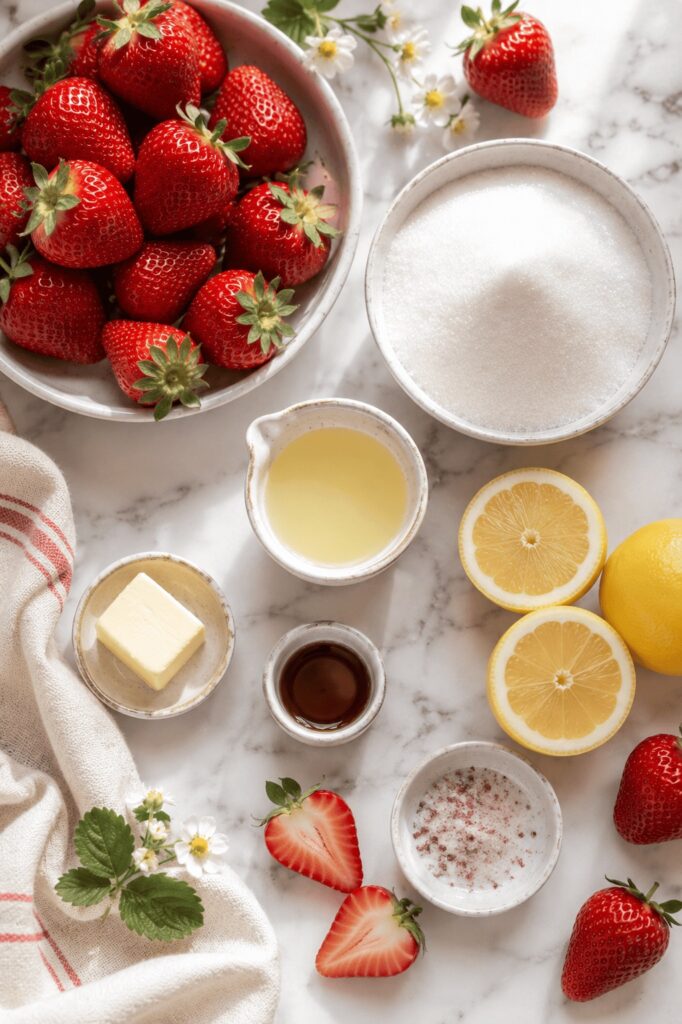
Fresh Strawberries
Fresh ripe strawberries are the heart of this recipe. Choose berries that are fragrant, deep red, and naturally sweet. Slightly overripe strawberries often create the best flavor for jam because they contain more natural sugars.
Wash the strawberries well, remove the stems, and cut larger berries into smaller pieces before cooking.
Granulated Sugar
Sugar sweetens the jam while also helping preserve it and create the proper texture. Homemade jam without enough sugar may stay too loose or spoil more quickly.
You can slightly reduce the sugar if preferred, but avoid cutting it drastically unless you plan to freeze the jam.
Lemon Juice
Fresh lemon juice balances the sweetness and helps the jam thicken naturally. It also brightens the flavor and prevents the jam from tasting flat.
Fresh lemon juice works best for the cleanest flavor.
Kitchen Equipment Needed
- Heavy-bottom pot: Helps the jam cook evenly and prevents scorching.
- Wooden spoon or silicone spatula: Makes stirring easy while the jam simmers.
- Measuring cups: Important for accurate fruit and sugar ratios.
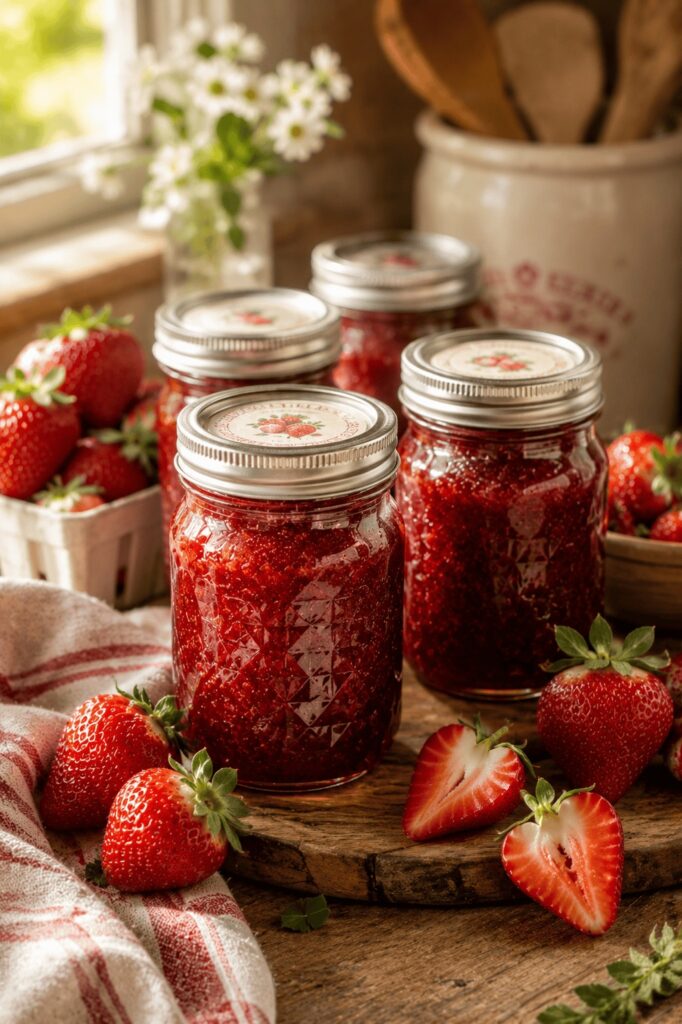
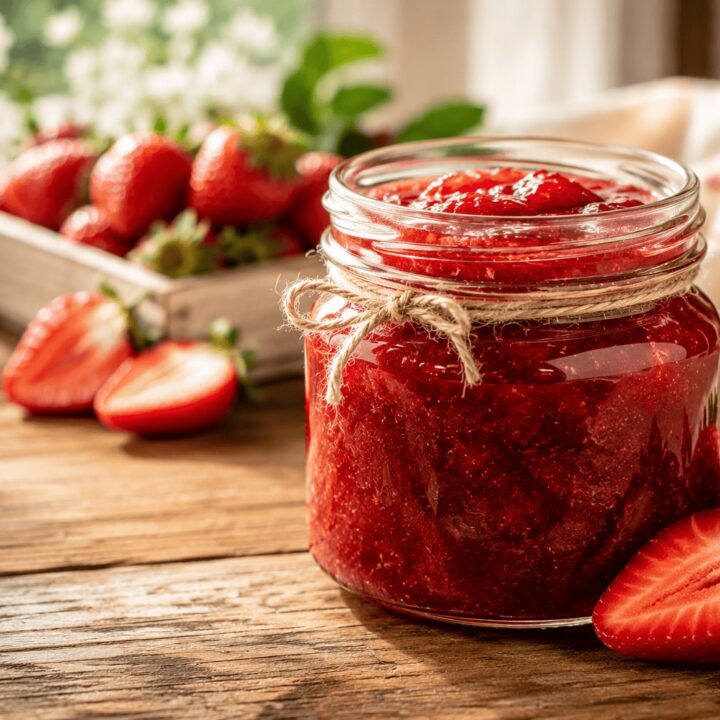
- Glass jars with lids: Used for storing the finished jam.
- Ladle: Makes filling jars cleaner and easier.
- Small plate: Helpful for testing jam consistency.
- Candy thermometer (optional): Useful if you want precise temperature guidance.
How to Make Strawberry Jam
Step 1: Prepare the Strawberries
Wash and dry the strawberries thoroughly. Remove the stems and slice larger berries into smaller pieces.
Place the strawberries in a large heavy-bottom pot.
Step 2: Combine the Ingredients
Add the sugar and lemon juice to the strawberries.
Stir well and allow the mixture to sit for about 10 to 15 minutes. This helps the strawberries release their juices naturally.
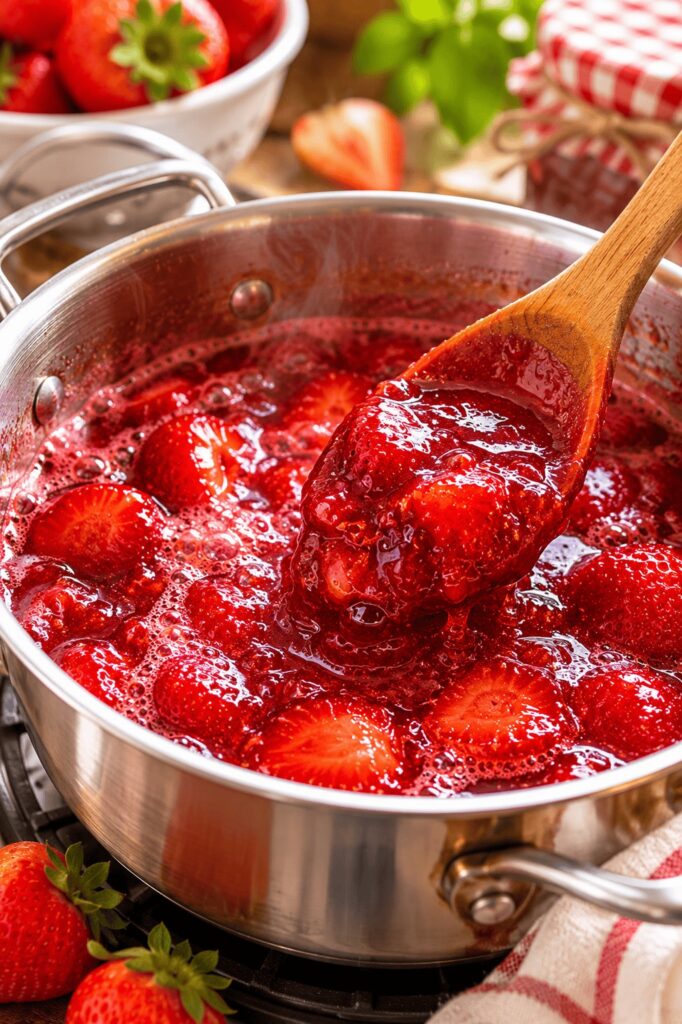
Step 3: Simmer the Jam
Place the pot over medium heat and bring the mixture to a gentle boil.
As the strawberries cook, stir frequently to prevent sticking. The strawberries will gradually soften, release more juice, and the liquid will slowly reduce into a thicker syrup.
Continue simmering for about 30 to 45 minutes depending on the moisture content of the strawberries and your preferred consistency.
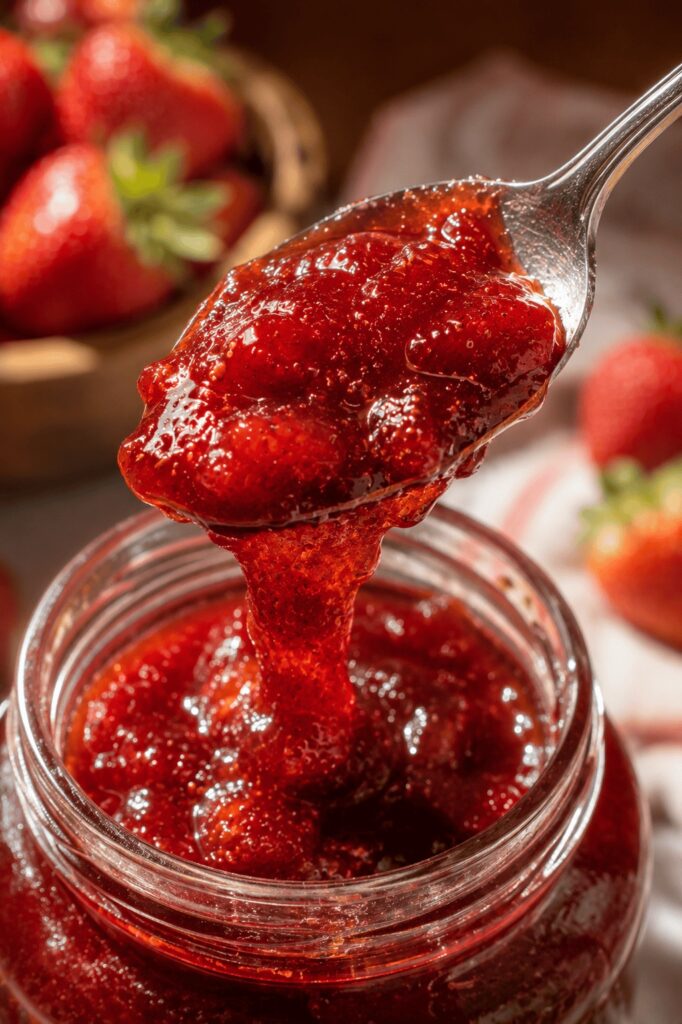
Step 4: Test the Consistency
To test the jam, place a small spoonful onto a cold plate and let it sit for a few seconds.
Push the jam gently with your finger. If it wrinkles slightly and holds shape, it is ready.
Step 5: Store the Jam
Remove the jam from the heat and let it cool slightly.
Transfer the jam into clean jars and seal tightly.
Store in the refrigerator or freezer once fully cooled.
How Do You Know When Strawberry Jam Is Ready?
Many first-time jam makers expect the jam to look fully thick while it is still hot. In reality, strawberry jam thickens much more as it cools.
Slightly loose jam during cooking often becomes perfectly spreadable after refrigeration.
One of the most common questions when making homemade strawberry jam is knowing exactly when the jam has finished cooking.
The texture changes gradually during simmering. At first, the mixture looks thin and watery. As the strawberries break down and the liquid reduces, the bubbles become thicker and slower.
There are several reliable ways to test strawberry jam consistency.
The Cold Plate Test
Place a small plate in the freezer before you start cooking.
When the jam looks thick, spoon a little onto the cold plate. Wait a few seconds, then push it gently with your finger. If the surface wrinkles slightly instead of running immediately, the jam is ready.
The Spoon Test
Lift some jam with a spoon and let it drip back into the pot.
If the jam falls in thick heavy drops instead of thin liquid streams, it has thickened properly.
Temperature Guidance
Many homemade jams set around 220°F (104°C), although texture can still vary slightly depending on the strawberries and sugar level.
Keep in mind that homemade strawberry jam may still look slightly loose while hot but continues thickening significantly as it cools.
Tips for the Best Strawberry Jam
Use ripe seasonal strawberries whenever possible. The flavor of your jam depends heavily on the quality of the fruit.
Avoid overcrowding the pot. A wider pot helps moisture evaporate more efficiently and speeds up thickening.
Stir regularly during cooking to prevent scorching on the bottom of the pan.
If foam forms on the surface while simmering, skim it off gently with a spoon if you prefer a smoother and clearer finished jam.
Do not rush the process by using very high heat. Slow simmering creates better flavor and texture.
Sterilize jars properly if you plan to store the jam for longer periods.
Why Is My Strawberry Jam Runny?
Runny strawberry jam is extremely common, especially for beginners.
In most cases, the jam simply needs additional simmering time for more moisture to evaporate
Strawberries naturally contain a lot of water, and some batches take longer to reduce depending on the fruit.
Wetter strawberries, larger batches, or shorter simmering times can all slow down the thickening process naturally.
Other possible reasons include:
- Too little sugar
- Insufficient simmering time
- Cooking at too low a temperature
- Large batches that reduce slowly
- Not allowing the jam to cool fully before judging texture
Keep in mind that homemade jam continues thickening during cooling, so judging the final texture while hot can sometimes be misleading.
If your jam still feels too thin after cooling, you can return it to the stove and simmer it a little longer.
Strawberry Jam Variations
Vanilla Strawberry Jam
Add a splash of vanilla extract near the end of cooking for a softer dessert-like flavor.
Honey Strawberry Jam
Replace part of the sugar with honey for a warmer, richer sweetness.
Low Sugar Strawberry Jam
Reduce the sugar slightly for a fresher fruit-forward flavor. This version is best stored in the refrigerator or freezer.
Strawberry Chia Jam
Stir chia seeds into the warm jam for a quick naturally thickened version with added texture.
Balsamic Strawberry Jam
A small splash of balsamic vinegar creates a deeper, more sophisticated flavor that pairs beautifully with cheese boards.
How to Store Strawberry Jam
Homemade strawberry jam should be stored in clean airtight jars.
For refrigerator storage, keep the jam chilled in airtight jars and use within about 2 to 3 weeks for the best flavor and freshness.
For longer storage, freeze the jam in freezer-safe containers while leaving a little room for expansion.
If properly canned and sealed, homemade jam can last much longer in a cool dark pantry.
Always check for unusual smell, mold, or discoloration before using stored jam.
Can You Freeze Strawberry Jam?
Yes. Strawberry jam freezes very well.
Allow the jam to cool completely before transferring it to freezer-safe jars or containers.
Leave some extra space at the top because the jam expands slightly when frozen.
Frozen strawberry jam keeps well for several months and tastes wonderfully fresh once thawed.
FAQ
Do you need pectin for strawberry jam?
No. Strawberries can thicken naturally when cooked with sugar and lemon juice. Homemade strawberry jam without pectin simply takes a little longer to simmer.
How long does homemade strawberry jam last?
Refrigerated jam usually lasts about 2 to 3 weeks. Frozen jam can last several months.
Can you reduce the sugar?
Yes, but reducing sugar too much can affect texture and shelf life.
Why did my jam not set?
Usually the jam needs additional simmering time or more cooling time.
Can you use frozen strawberries?
Yes. Frozen strawberries work well, although they may release extra moisture and require slightly longer cooking.
What is the difference between jam and preserves?
Jam has a smoother spreadable consistency, while preserves typically contain larger chunks of fruit.
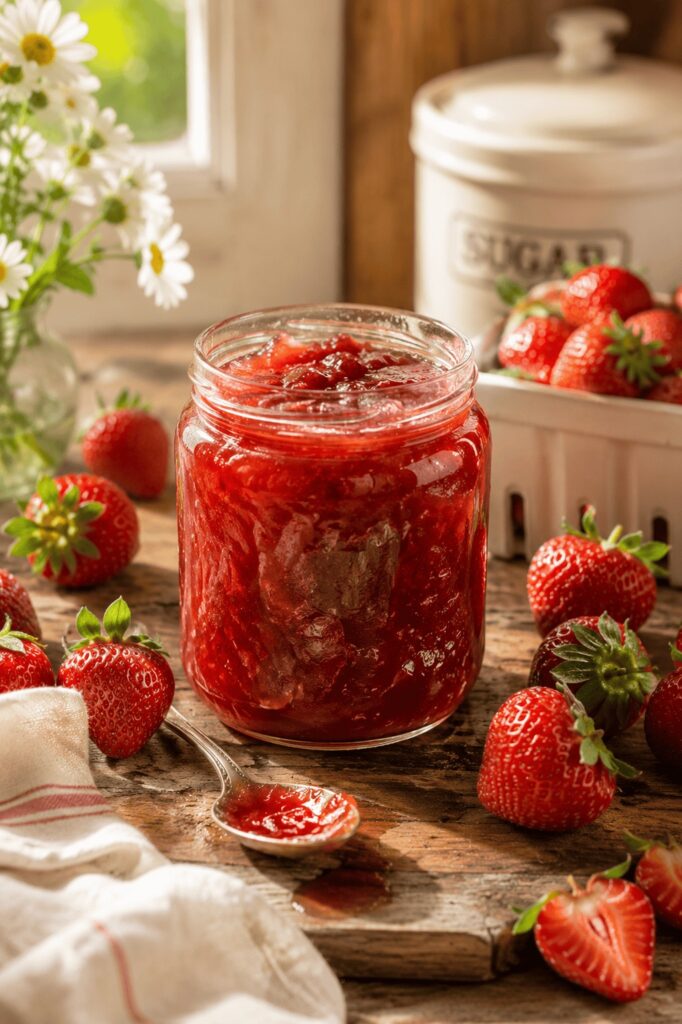
Conclusion
Homemade strawberry jam is one of the simplest and most rewarding seasonal recipes you can make. With just a few basic ingredients and a little patience, you can create a rich, glossy jam packed with fresh strawberry flavor.
This homemade strawberry jam without pectin creates a softer traditional texture with rich strawberry flavor and a more natural homemade consistency. Whether you enjoy it on warm toast, spoon it over desserts, or store a few jars for later, it brings a little taste of summer into every bite.
Once you make homemade strawberry jam from scratch, it’s hard to go back to store-bought versions. The flavor, texture, and freshness are simply unmatched.
Homemade Strawberry Jam
This homemade strawberry jam without pectin is rich, glossy, and packed with fresh strawberry flavor. Made with simple ingredients and a slow simmering method, this classic homemade jam creates a soft, naturally thick texture perfect for toast, desserts, yogurt, and baking.
Ingredients
- 2 pounds fresh strawberries, hulled and sliced
- 4 cups granulated sugar
- 2 tablespoons fresh lemon juice
Optional Variations
- 1 teaspoon vanilla extract
- 2 tablespoons honey
- 1 tablespoon chia seeds
- 1 teaspoon balsamic vinegar
Instructions
1. Prepare the Strawberries
Wash, dry, hull, and slice the strawberries. Place them in a large heavy-bottom pot.
2. Combine Ingredients
Add sugar and lemon juice to the strawberries. Stir well and let sit for 10 to 15 minutes until juices begin to release.
3. Simmer the Jam
Place the pot over medium heat and bring to a gentle boil. Stir frequently while the strawberries soften and the liquid reduces.
4. Cook Until Thickened
Continue simmering for 30 to 45 minutes until the jam thickens and bubbles become slower and heavier.
5. Test the Consistency
Place a spoonful of jam onto a cold plate. If it wrinkles slightly when pushed, the jam is ready.
6. Store the Jam
Allow the jam to cool slightly, then transfer into clean jars and seal tightly.
Notes
- Use ripe strawberries for best flavor
- Do not rush simmering with very high heat
- Stir frequently to prevent sticking
- Jam thickens more as it cools
Serving Suggestions
- Spread over toast or biscuits
- Serve with pancakes or waffles
- Swirl into yogurt or oatmeal
- Use in cheesecakes and desserts
- Pair with cheese boards
Storage
- Refrigerate for up to 2 to 3 weeks
- Freeze for several months in freezer-safe containers
- Store canned jars in cool dark place if properly sealed
Nutrition Information:
Yield: 1 tablespoonAmount Per Serving: Calories: 45Carbohydrates: 11gSugar: 10g
Nutrition information is an estimate and may vary depending on the exact ingredients, brands, and portion sizes used. This information is provided for general guidance only and should not be considered a substitute for professional nutritional advice.

